使用Cloudflare Tunnel 访问 k3s 集群服务
本文最后更新于 56 天前, 如有失效请评论区留言.
这可以说是对内网穿透方式的一种补充,大多数情况下,内网穿透是内网访问,有时候还需要对外提供服务。Cloudflare Tunnel就是一种很好的方式,配置简单,且免费。
前提
- 已经可用的k3s集群
- 已注册Cloudflare账号且有域名托管在上面
原理
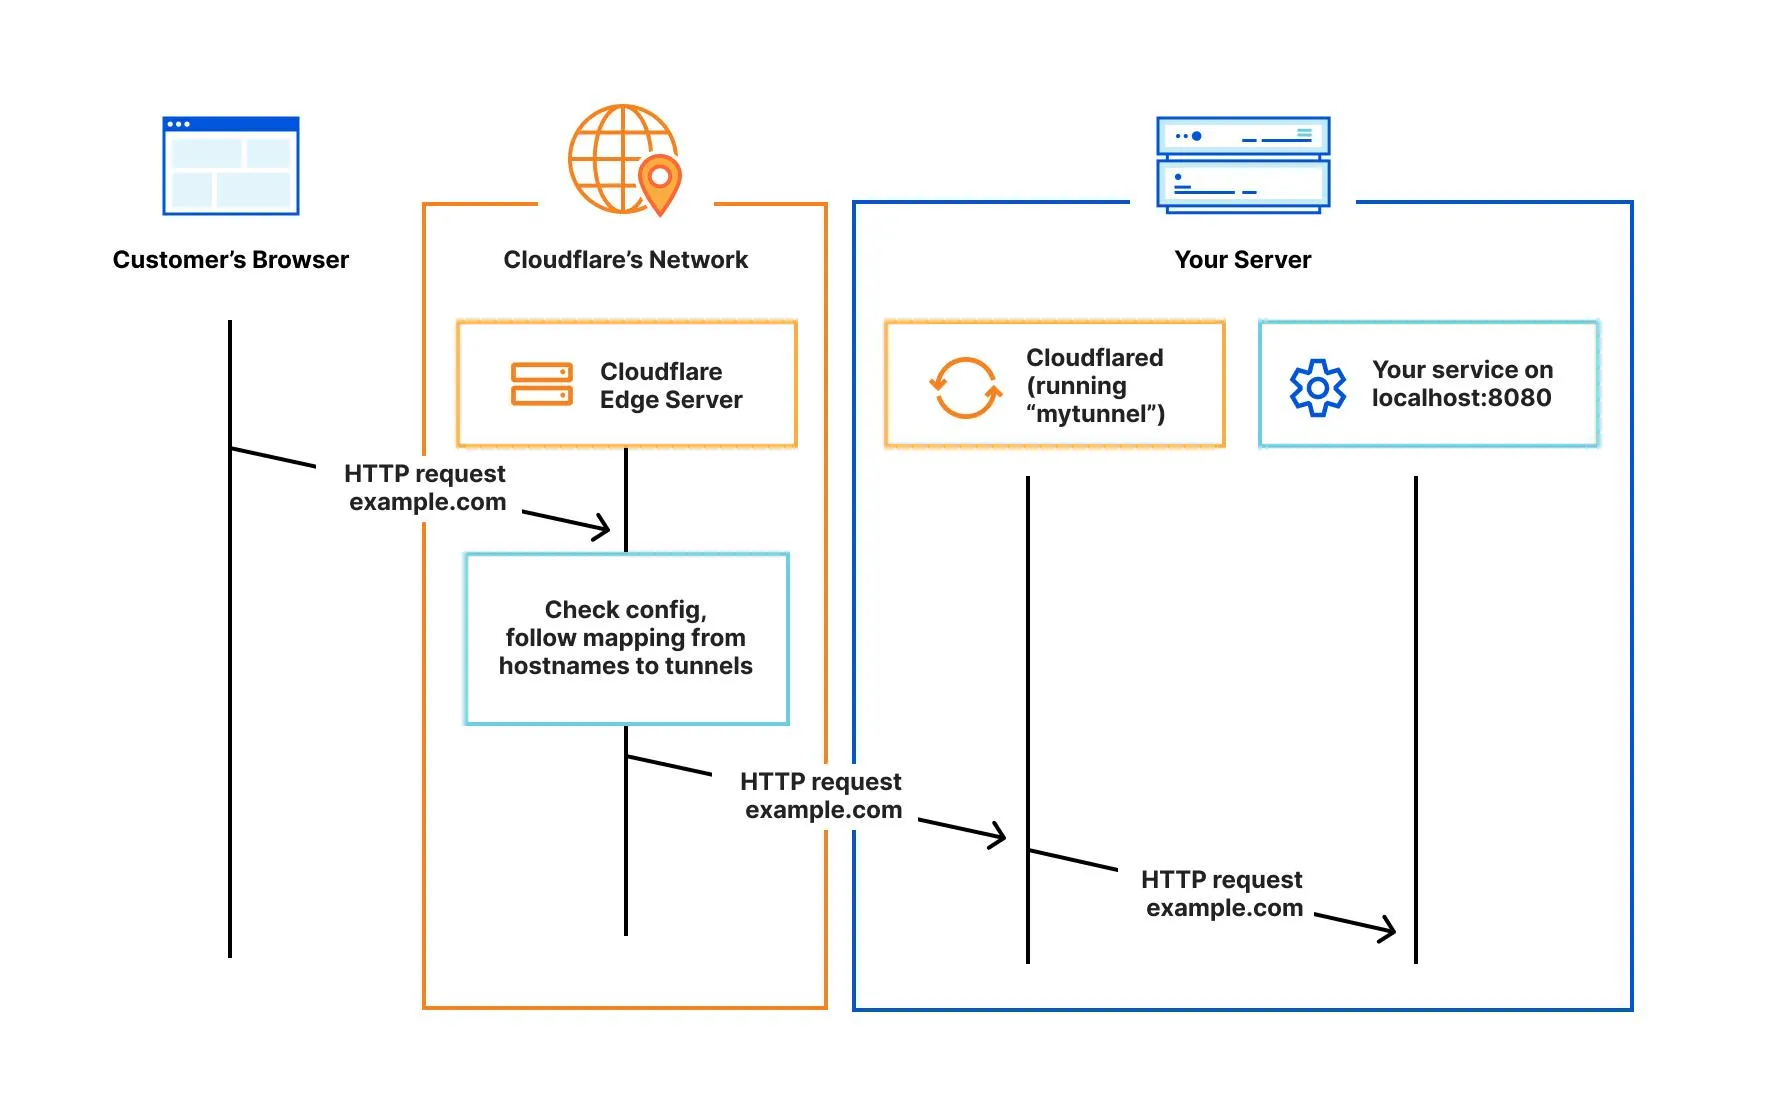
当用户访问你的域名时,Cloudflare会将流量导向Cloudflared服务,由Cloudflared将流量路由到正确的服务上。
具体细节可用参考 官方文档
实践操作
安装cloudflred
这里仅列出在macOS上的操作,其他操作系统可参考官方文档cloudflred
brew install cloudflare/cloudflare/cloudflared
登录且绑定域名
cloudflared tunnel login
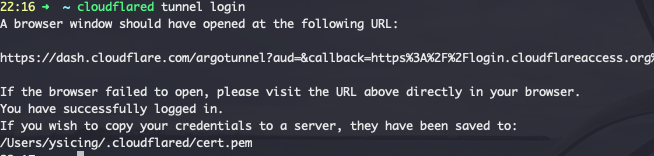
执行上面的命令后会自动打开浏览器,然后登录到 Cloudflare, 选择一个域名使用即可。
新建tunnel
cloudflared tunnel create demo
通道名你随意哈。通常情况下,同一个网络环境下,一条通道就足够了,无需为每个服务都创建新通道。
执行完,会生成一个json文件,后面有用。
Tunnel credentials written to /Users/ysicing/.cloudflared/97e40eda-x-49e6-b399-x.json. cloudflared chose this file based on where your origin certificate was found. Keep this file secret. To revoke these credentials, delete the tunnel.

Created tunnel demo with id 97e40eda-x-49e6-b399-x
这个json文件存储了授权相关信息,尽量避免泄漏。
授权文件保存到k3s
这里我将凭证信息存储到ds-system命名空间下,统一管理
kubectl create secret generic tunnel-credentials \
--from-file=credentials.json=/Users/ysicing/.cloudflared/97e40eda-x-49e6-b399-x.json -n ds-system
将隧道与 DNS 记录关联
登录后台,选择登录时选定点域名,添加cname记录
whoami cname 97e40eda-x-49e6-b399-x.cfargotunnel.com

这个截图有问题, 也可以命令行配置
cloudflared tunnel route dns whoami whoami.webpod.eu.org
在集群内运行cloudflared
官方默认提供的示例cloudflared.yaml 可能我们需要调整一下。
主要是修改几个地方,一个是镜像启动参数,一个是tunnel配置参数,以及tunnel要转发的后端服务whoami,因为我之前测试traefik,已经部署过whoami了
18c18
<         image: cloudflare/cloudflared:2022.3.0
---
>         image: cloudflare/cloudflared
25a26,27
>         - --protocol
>         - http2
75c77
<     tunnel: example-tunnel
---
>     tunnel: 97e40eda-x-49e6-b399-x
92,98c94,95
<     - hostname: tunnel.example.com
<       service: http://web-service:80
<     # This rule sends traffic to the built-in hello-world HTTP server. This can help debug connectivity
<     # issues. If hello.example.com resolves and tunnel.example.com does not, then the problem is
<     # in the connection from cloudflared to your local service, not from the internet to cloudflared.
<     - hostname: hello.example.com
<       service: hello_world
---
>     - hostname: whoami.natpod.eu.org
>       service: http://whoami.default.svc:80
生效配置
kubectl apply -f cloudflared.yaml -n ds-system
到这里,服务应该可用了哈。
最后
成果可以访问whoami
